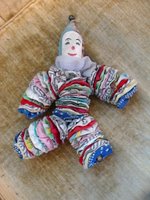
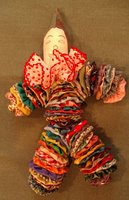
I was sitting here tonight and thinking what a great( grandmother )I had she has passed on now.. She made me a yoyo glown.. that is what we called them years ago.. So I decided to check and see if I could find one and direction.. This looked alot like mine except for the face and ruffle.. Back years ago I don't think my grandmother had the means for ruffle fabric... So this is what I what I want share with you.. Oh I forgot you can buy little templates and heart shape to make yoyo I have both.. But my years of growing up we used a piece of cardboard... worked great... Sisterbrenda

Some people call these yo-yo clown dolls but yo-yo friends is a better name. I have seen dog , cat, elephant, clown, baby, mouse, pig, bunny, giraffe,and bear ones, so it can be more than a clown. It is not hard to make a yo-yo friend; just a little prep work first.
Please read through all instructions before starting your yo-yo friend.

supplies
4. 3 two hole buttons
5. Nylon thread and needles
If you don't want to use bells, be creative and think of other ideas. Look at my pictures and the links to other people pictures. You can use different types of bells, shank buttons, pom poms, felted wool, or make some stuffed ones for hands and feet, too.
Instructions
Legs
Arms
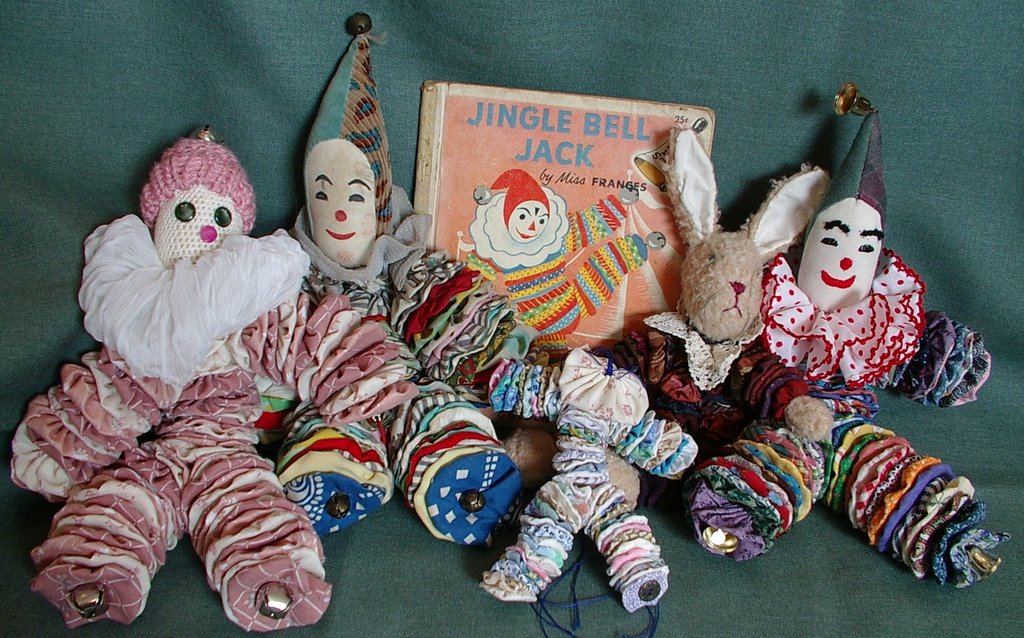
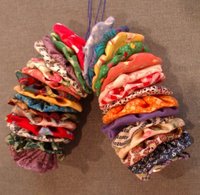
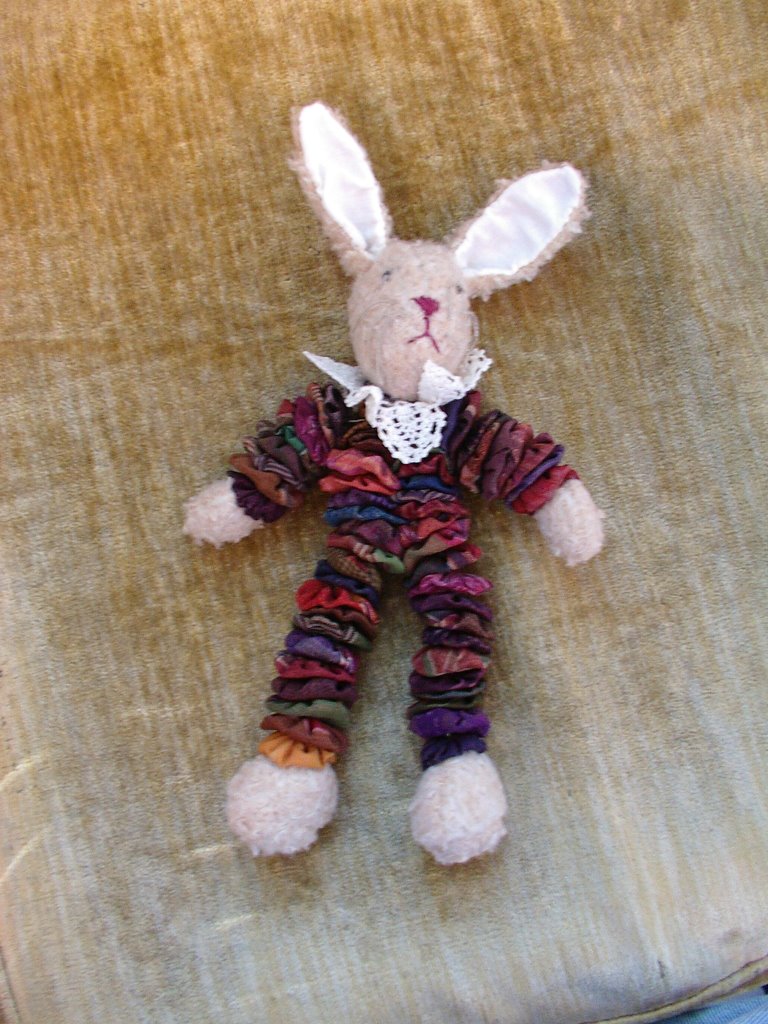
If you look at the bunny, it has a different type of body; there are two sets of yo-yos making up it's torso. This is done the same as the clown except that there are two bodies added straight on top of the legs, making the legs 19 yo-yos long. Then, when made, weave the top 7 from each side together every other side. Stitch through on the edges to weave them together to form the body. As yo-yos got smaller, I used less and less of them. One yo- yo for neck and a doily for a collar. There is only one button in this one in the head to make a strong connection so the knot doesn't pull through the fabric in time.
 Copyrighted : The bunny was made from a kit years ago. I also made a bear from this same company in the form of a kit. My niece back east owns it, so I can't post a photo of that one. If some one knows the name of it, let me know and I will post it as I want to give credit where credit is due on that one. I can't remember who it was right now.
  So any questions on how to make the hands and the head I have the instructions somewhere, but can't find them at the moment. They are also under copyright so I can not give them out, sorry. But I can post the name of pattern and publisher when I find them. When I find them I will update. The rest of the instruction I made up from a doll my cousin gave me when I was a baby, so they are a pattern I drafted myself.
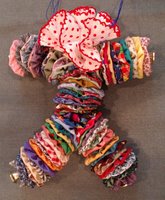
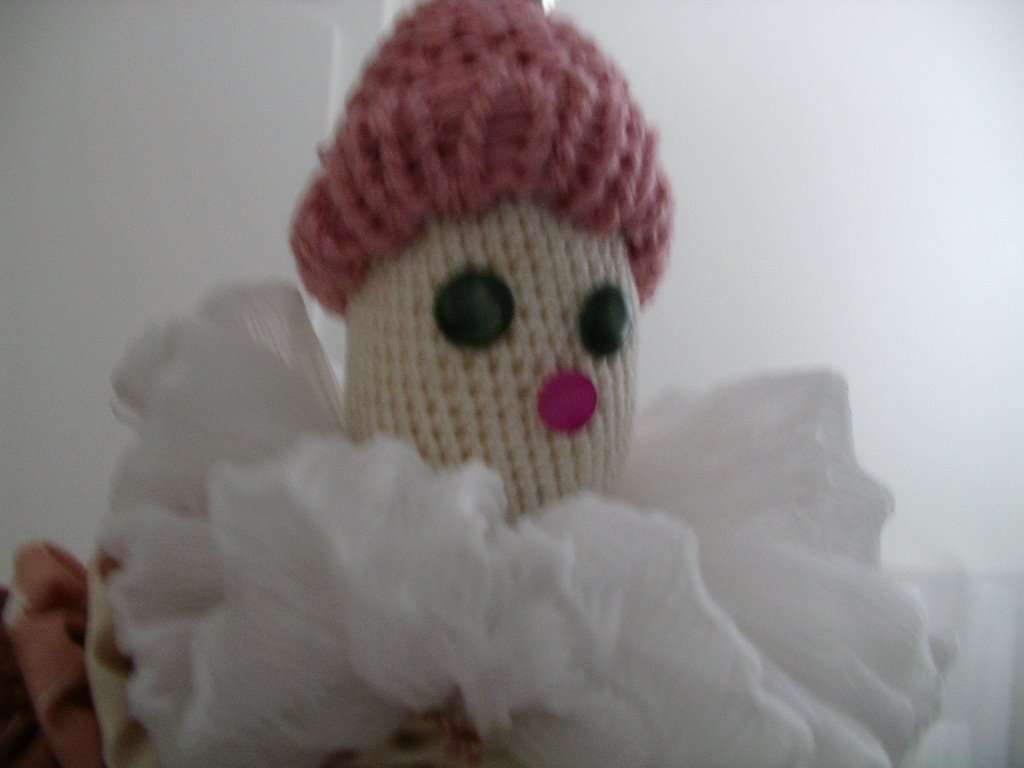
 The headless bear was done using a cup so as the yo-yos are smaller. He is my WIP for the week. I will make his head either today or tomorrow, then I will show him finished. The bear also has metal buttons for hand instead of yo-yos.
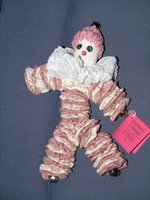
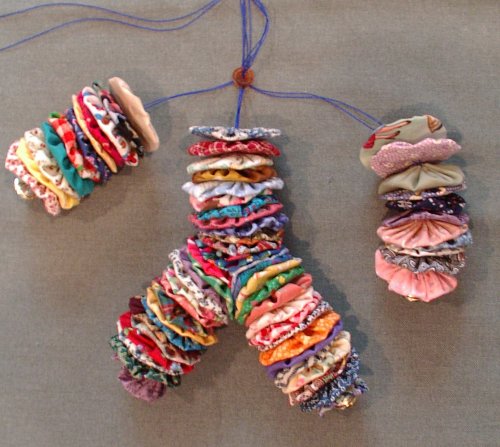
The pink one belongs to my middle daughter; I gave it to her for her birthday. The one I made for this tutorial I gave to my littlest daughter for her birthday. The others are mine. The one pictured left of the bunny was given to me by my cousin Brenda at my Baby shower so it is 35+ years old. Little did she know her one toy would become a life long favorite starting a collection of clown dolls (pirouette and mimes). She is now a survivor of cancer but will never be able to eat or drink again; she is feed through a IV every few days. So if you make one or more you will be honoring her as she is a great seamstress and a beloved cousin. I will probably make at least one more and give it to my oldest daughter for her next birthday. Then when they grow up I will probably make them for my grand kids. ;0) I hope that is a ways off yet!
 You can make up your own variations of this. Have fun! Holler if you have a question.
Please, if you make one send me the picture or a link to it so I can add your's here or on a special page for all to see. I would love a show-and-tell of all the yo-yo friends. Even if it is not one you made but you have had for years, please show them, too.
How to make a yo-yo friend
WARNING: Please remember buttons and bells are a chocking hazard. If given to a baby/toddler, it is only a decorative item . This toy is fine for a kid who is older who will not put items in mouth or nose. Please make sure you tell the mom and dad this.
Some people call these yo-yo clown dolls but yo-yo friends is a better name. I have seen dog , cat, elephant, clown, baby, mouse, pig, bunny, giraffe,and bear ones, so it can be more than a clown. It is not hard to make a yo-yo friend; just a little prep work first.
Please read through all instructions before starting your yo-yo friend.
supplies
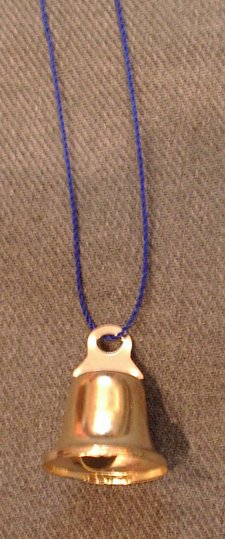
1. 4 to 5 jingle bells -- one for each hand and foot and one for hat if you want one on top
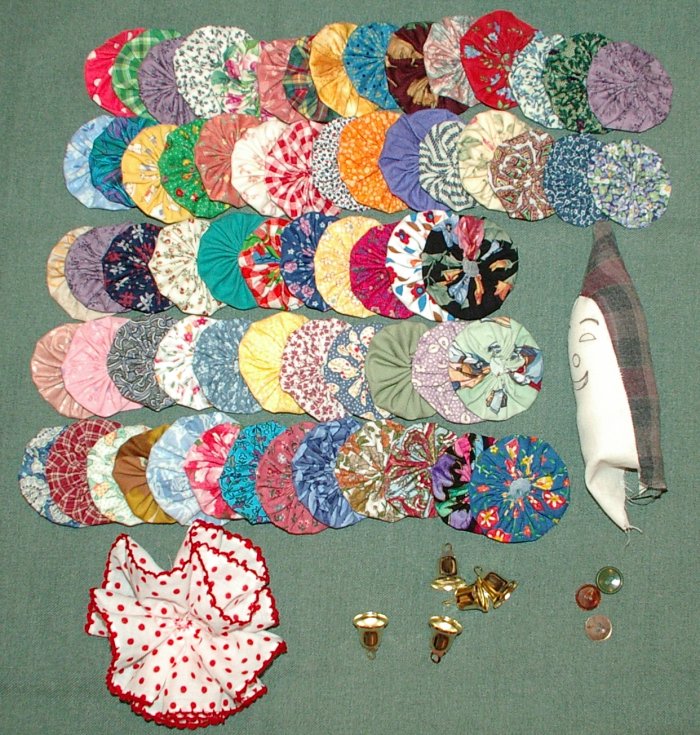
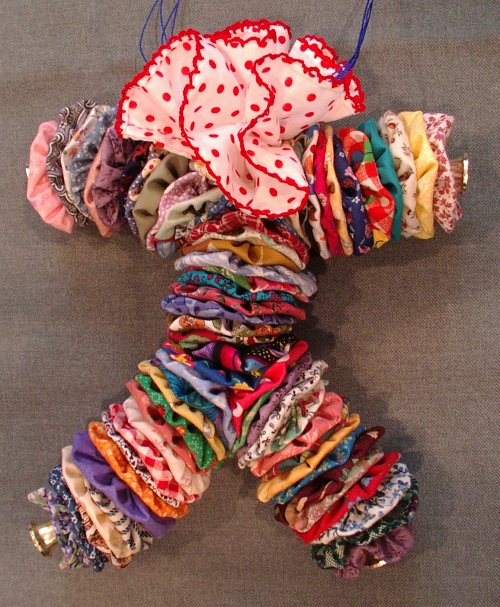
2. yo-yos needed: 66 cd size; 1 plate size (break down below). For a how to make a yo-yo tutorial follow links to Heather's site for a great one. You can also get together with friends and exchange yo-yos. There are lots of things you can make with yo-yos.- 30 yo-yos legs cd size template
- 22 yo-yos arms cd size template
- 13 yo-yos body cd size template
- 1 yo yo neck cd size template
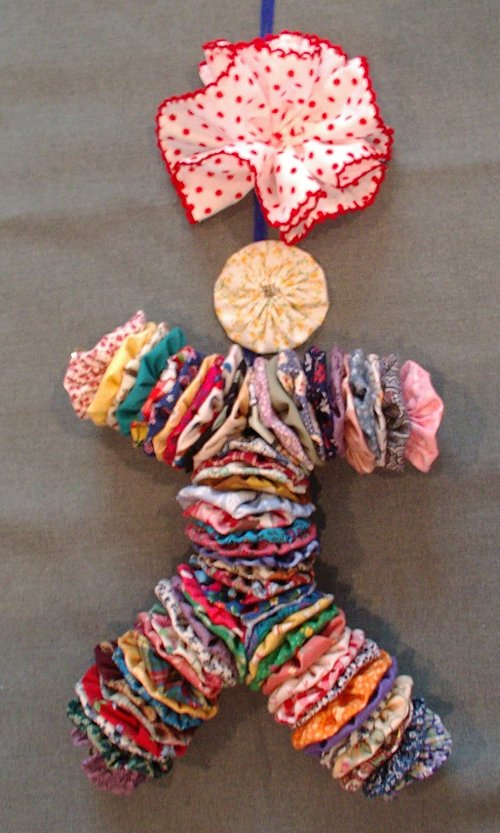
- 1 really big yo-yo collar plate template. You can use lace gathered up or any other wide fabric to make a ruffled collar, even a small doily. See pictures of finished dolls.
4. 3 two hole buttons
5. Nylon thread and needles
If you don't want to use bells, be creative and think of other ideas. Look at my pictures and the links to other people pictures. You can use different types of bells, shank buttons, pom poms, felted wool, or make some stuffed ones for hands and feet, too.
Instructions
Legs
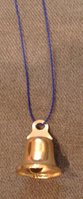 Take a jingle bell, put a string through the bell loop, pull two ends together and put through a needle with bell dangling.
 - String on yo-yos; I use 15 yo-yos. Put needle through center of yo-yo. Do again for other leg (use very strong thread; I use nylon then melt the ends when all done after knotting on the head so it doesn't undo itself (which it tends to do other wise).
- remember melt after head is on not after legs are tied
- Make sure yo-yos face away from the jingle bells
Arms
- Take a jingle bell, put a string through the bell loop, pull two ends together and put through a needle with bell dangling.
- String on yo-yos; I use 11 yo-yos. Do again for other arm.
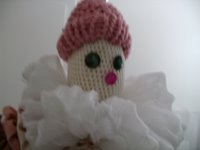
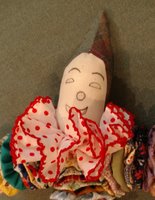
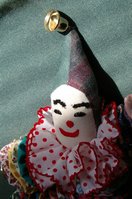
- Make a head with a hat; add jingle bell to hat. You can either paint, embroider, machine sew, or use buttons for the face. It's usually easier to do the face then assemble. I don't always do things in the easiest order. I like to assemble the head then put the face on so it looks like it is in the right spot after being sewn together.
 Now you are ready to assemble. Pass one needle with leg attached through one hole on one button; pass the other leg through the other hole. Tie a knot about three times. The button gives you stability with tying knots. Make sure legs are even in tension before knotting.
 - String on all body yo-yos. Pass both needles through the center of all yo-yos. Do not put all the thread on one needle; having the thread go through the yo-yos in two different spots stabilizes the body from spinning so much and wearing out the thread. Pass one set of threads through one hole in next button and then pass the other set of threads through the other hole in that same button.

- At this point, take the arms and string them through the button, one set of arms per hole. Now tie two knots to secure in place.

- Pass all threads through the neck yo-yo and the collar yo yo.

 Now pass needle and thread through the bottom of head, attach third button at this point inside of head. The back of the head should have been left open for this procedure. Pass half of the thread through each button hole. Tie lots of knots, melt thread a little into last knot. Have moist fingers, blow out fire and pinch while hot to secure last knot. The melted tip will keep the knots from undoing themselves.
 - Stuff head and close up.


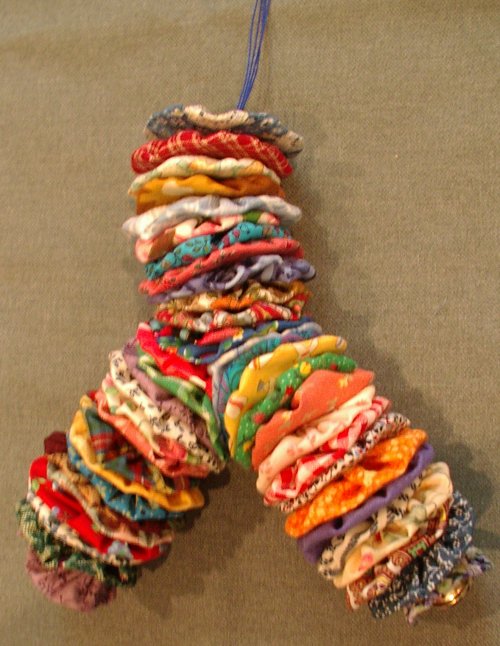


If you look at the bunny, it has a different type of body; there are two sets of yo-yos making up it's torso. This is done the same as the clown except that there are two bodies added straight on top of the legs, making the legs 19 yo-yos long. Then, when made, weave the top 7 from each side together every other side. Stitch through on the edges to weave them together to form the body. As yo-yos got smaller, I used less and less of them. One yo- yo for neck and a doily for a collar. There is only one button in this one in the head to make a strong connection so the knot doesn't pull through the fabric in time.

 Copyrighted : The bunny was made from a kit years ago. I also made a bear from this same company in the form of a kit. My niece back east owns it, so I can't post a photo of that one. If some one knows the name of it, let me know and I will post it as I want to give credit where credit is due on that one. I can't remember who it was right now.
  So any questions on how to make the hands and the head I have the instructions somewhere, but can't find them at the moment. They are also under copyright so I can not give them out, sorry. But I can post the name of pattern and publisher when I find them. When I find them I will update. The rest of the instruction I made up from a doll my cousin gave me when I was a baby, so they are a pattern I drafted myself.
 The headless bear was done using a cup so as the yo-yos are smaller. He is my WIP for the week. I will make his head either today or tomorrow, then I will show him finished. The bear also has metal buttons for hand instead of yo-yos.
The pink one belongs to my middle daughter; I gave it to her for her birthday. The one I made for this tutorial I gave to my littlest daughter for her birthday. The others are mine. The one pictured left of the bunny was given to me by my cousin Brenda at my Baby shower so it is 35+ years old. Little did she know her one toy would become a life long favorite starting a collection of clown dolls (pirouette and mimes). She is now a survivor of cancer but will never be able to eat or drink again; she is feed through a IV every few days. So if you make one or more you will be honoring her as she is a great seamstress and a beloved cousin. I will probably make at least one more and give it to my oldest daughter for her next birthday. Then when they grow up I will probably make them for my grand kids. ;0) I hope that is a ways off yet!
 You can make up your own variations of this. Have fun! Holler if you have a question.
Please, if you make one send me the picture or a link to it so I can add your's here or on a special page for all to see. I would love a show-and-tell of all the yo-yo friends. Even if it is not one you made but you have had for years, please show them, too.


Nice to meet you Sisterbrenda :-)
ReplyDeleteThank you for visiting,quite a story!
I shall tell my daughter about the yoyos!
blessings Linnie
Hello...........I wanted to come and say hello. Thank you so much for coming and leaving a comment on my blog. I so love to meet new ladies. I don't remember having you before anyway.
ReplyDeleteThank you so for your tutorial.........very sweet. I love making yoyo's........a favorite pastime!
Hugs sweet friend, Linda
Hi Linnie thanks for stopping by... Please tell your daughter about the yoyos they are lots of fun... Have a blessed day with family and friends.. sisterbrenda
ReplyDeleteHi Linda glad you stopped by .. Thank you for the kind comment and yes yoyo are a great way to past time away.. Have a blessed day with family and friends.Sisterbrenda
ReplyDelete